Tuesday, 29 August 2017

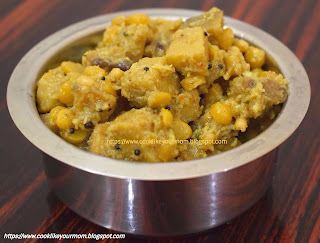
Chenai Elavan Kootu / Yam White Pumpkin Curry


"Onam", the 10 day long festival of Kerala has begun and is until Sep 6th.
This Yam dish is one of the items served in an "Onam Sadhya"(Traditional meal with at least 24 items). 

This salt and sweet thick gravy goes well with any tangy main course (Sambar rice/Rasam rice/Tamarind rice) or  Indian bread (Chapati/Phulka).

Chopping "Yam" is strenuous because of its size. I have vivid memories of my mom using the traditional vegetable cutter (AruvaManai), to chop this huge vegetable.

The recipe below is just the way my mom makes. It can be personalized as per one's own wish.
The main ingredients are Yam and Split Chickpea (Chana Dal). However, the White pumpkin adds a chunky, juicy twist to the dish. 
The quantity of the Chickpea, Coconut and White Pumpkin can be altered as per one's own choice.

Ingredients
Yam/Chenai                               : 350 Gms
White Pumpkin/Pooshanikkai   : 250 Gms
Split Chickpea/Chana Dal         : 1/4 Cup
Turmeric                                    : 1/8 Tsp
Salt                                             : As per taste
Chilli Powder                             : 1/4 Tsp (Depending on how hot your chilli powder is)
Grated Jaggery/Vellam                 : 1 Tsp

For Grinding
Grated Coconut                          : 1/4 cup
Cumin Seeds/Jeera                     : 1 Tsp

For seasoning
Mustard                                       : 1/4 Tsp
Skinned Black Gram / Urad Dal : 1/4 Tsp
Curry Leaves                               : 2 sprigs
Grated coconut                            : Little less than 1/4 cup

Procedure

1) Soak the Chana dal for at-least 15 minutes.
2) Wash, peel and cut the yam and white pumpkin into chunky cubes of equal size. 
3) Take a broad pan, add the cut vegetables along with chana dal, salt, turmeric powder and chilli powder. Add enough water and allow it to cook. Stir once in a while.
4) Once the ingredients are cooked, add jaggery to this melange. Allow it to blend well. At this stage, your curry should have just enough water to accommodate the ground coconut paste. Switch off the flame.
5) Grinding : Grind Jeera and coconut into a paste and add it to the curry.
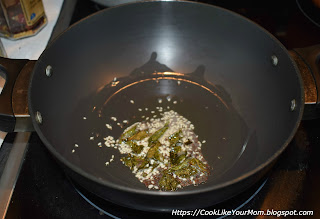
7) Seasoning : Take a pan, add oil and temper the whole spices. Add the curry leaves, grated coconut and roast them well. Once roasted add it to the curry.

The curry is ready to be served.


Variation
- Instead of using a pan to cook the dal and veggies, you can pressure cook them for two or three whistles. Do not over cook them.
While pressure cooking, add the salt, turmeric and chilli powder too.

Tips
- Wash, peel and wash the Yam before chopping.
- Rubbing the peeled Yam with tamarind, salt and turmeric will negate the itchy sensation it may cause.
- The texture is very important. If it is over cooked, the dish will become mushy. 
- Soaking the chana dal will help it cook better.
- Each ingredient has a different cooking time. Pumpkin gets cooked faster. Chana dal and the yam will get cooked late.
- While cooking in an open pan, stir once in while so that the veggies don't get burnt. Don't add a lot of water.
- After the veggies are cooked, if the dish is watery, then
a) It can be drained.
b) Or take a few pieces of yam and mash it so that the consistency becomes thick.
c) Or dilute a tsp of rice flour in less than 1/4 cup of water and add it to the curry and boil. This will help thicken the curry.

Cooking is an art. It is to be catered to one's own taste and imagination. When you know the hacks to save your dish, nothing can go wrong with your cooking.
Enjoy this amazing dish.
Sunday, 23 July 2017

Semiya Kesari / Sevvaiyan Sheera / Shavige Kesari / Vermicelli Sweet


After a long hiatus, here I come with a recipe of a sweet. I had been busy relocating and settling in a new place in the last one year. I did take pictures of my cooking on a timely basis but never gathered the energy to publish the recipe. I made this sweet two days back for "Saibaba" and felt I should re-start my blog from here. Continuing the blog with a sweet will be the right way, isn't it? :)

"Semiya Kesari" is very dear to me. Every time I think of this sweet, I get reminded of the first time I tasted it as a child. I love the texture and the way it tastes.
When Amma asked for my preference while making a "Kesari (Sheera)", my answer would always be "Semiya Kesari" or "Aval Kesari" (Kesari made out of Aval/Poha/Beaten rice). I always preferred these than the regular "Rava Kesari".

This dish can be made as a dessert or a tea time snack. While serving, one can top it with chopped roasted almonds or a little bit of Rabdi (A sweet made out of condensed milk).

Ingredients :

Serves 4 - 5 bowls

Semiya/Sevvaiyan/Shavige/Vermicelli : 1 cup
Sugar                                                     : 0.75 cups (I used unpolished sugar. The quantity can be reduced or increased based on the sweetness quotient.)
Water                                                     : 2.5 cups
Ghee/Clarified butter                             : 0.25 cups (If you are using a nonstick kadai, you may reduce the amount accordingly)
Chopped cashews and raisins                  : 1 to 2 Tspn (per your need)
Cardamom powder                                 : 1/4 Tspn
Saffron powder(for colour, optional)      : A pinch.

Procedure
1) Take a frying pan, roast the Semiya and keep it aside.
2) Add part of the ghee to the pan and roast the cashews and raisins.
3) Once the nuts are roasted, add the water, saffron powder and allow it to boil.
4) When the water is boiling, slowly add the roasted Semiya. As you do it, keep stirring with the other hand.
5) Allow the Semiya to cook well in the pan. You can keep stirring time and again so that it doesn't stick to the bottom of the pan. You can also cover and keep for a while.
6) When the Semiya is done, add the sugar to the pan and stir well.
7) Add the remaining ghee little by little and keep stirring.
8) At one stage the Semiya will start leaving the sides of the pan and the Ghee will start oozing out of the Kesari. Add the Cardamom powder and mix well. This is the right time to switch off the flame.
9) Hot Semiya Kesari is ready to be served.

Serving :
- Serve it as it is.
- Add chopped roasted almonds for garnishing.
- Chill it and top with Rabdi.


Variations :
- Half milk and half water can be used for cooking the Semiya. This will make it taste rich.
-  For making Pineapple flavoured Kesari : Add a Tspn of pineapple chunks and a few drops of essence while the water is boiling. Chunks will have to be cooked in sugar before using.

Tips :
- You can roast the Semiya in Ghee for extra flavour or simply dry roast it.
- You can also use roasted Semiya which is available in the market.
- While the Semiya is being added to the boiling water, stirring with the other hand is mandatory. This will help avoid the formation of lumps.
- If your Semiya is undercooked, you can add boiling hot water to it little by little to get it cooked well.
- Once the sugar is added, the Semiya will get stiffened. So Semiya should be cooked well.
- If you add more Sugar, the dish will turn out sticky.
- Add ghee little by little rather than adding the entire quantity at once. This will help know how much more is needed.
- The Semiya's thickness, sugar's sweetness play a role in the texture and cooking of the sweet. I have used the normal thickness Semiya and not the fine one. If you are going to use the fine one, then the water and sugar quantity have to be reduced a bit.

Friday, 27 May 2016

Rava Dhokla


After a long gap I finally found some time to publish...

Rava Dhokla is a steamed delicacy from Gujarat. This is usually served hot with "Pudina Chutney"(Spicy mint dip) or "Methino Masala" (Coarsely ground spicy fenugreek powder).
This dish can be served for breakfast, starter for a lunch or dinner, or as snack by itself. Its fluffy, spongy and also filling :)

The version explained here is a basic one, however variations can be made by adding vegetables like carrot, peas, finely chopped beans to it. A person from south of India can easily relate to this as it tastes little bit like Rava Idli.

This traditional recipe was shared by my very good friend Darshana, who hails from Gujarat. I thank her for the recipe and helping me with the dish and also sharing the nuances !! I had kept this recipe in draft for many weeks, as I couldn't find time to put things together. As today is Darshana's wedding anniversary, I couldn't find a better occasion to wrap up and publish this amazing recipe.


Ingredients :

(For making close to 20+ pieces)

For the Dhokla


Fine Rava / Semolina                : 1 cup (240ml)
Curd (Sour live set preferable)  : 1 cup
Ginger                                        : 1/2 inch
Green chillies                             : 2 to 3 (as per taste)
Fruit salt                                     : 1 Tspoon(~5 ml) (I used plain Eno)
Cooking oil                                : 2 Tspoons
Water                                          : 1/4 cup (Approx)
Salt                                             : as per taste

For Seasoning


Mustard seeds                                : 1/2 Tspoon
Sesame seeds (White preffered)    : 1/2 Tspoon
Curry/Coriander leave                   : 1 sprig
Grated coconut                              : 1 Tspoon
Asafoetida (Heeng/Perungayam)  : One pinch
Cooking oil                                    : 1 Tspoon


Procedure

Dhokla

- Coarse grind green chilli and ginger.

- Take a broad vessel, add semolina(rava), curd, chilli-ginger paste and salt. Mix it well. Check for the consistency. It should be spoonable, but not flowy. When you take a spoonful of batter and pour it, it shouldn't fall smoothly, but with breaks. If the consistency isn't achieved and if the batter is too thick, add little water and mix well.


- Keep the batter aside for 15 to 20 mins.
- In the mean time grease a wide plate, set a steamer, and keep the greased plate in it and switch on the steamer. This will help pre-heat the steamer.
- After 15 to 20 mins, check the batter. As semolina/rava soaks moisture, the batter would have become thick. Add water little by little till spoonable consistency.

- Add oil to the batter. Mix well.


- Add the fruit salt and mix well. The batter will foam little bit due to the fuit salt which was added.

Fruit salt is added and stirred well. Foaming can be seen in the above pic.
- Now quickly pour the batter into the plate kept inside the steamer. Be cautious while pouring.


- Shake the plate to spread the batter evenly.


- Close the steamer and allow it to steam in high for 5 mins.


- Bring the stove to medium and steam for 15 more mins.
- See to it that the steamer has enough water. If the water level reduces, pour boiling water carefully into the steamer. Care is to be taken that it doesn't spill on the Dhokla
- After 20 full minutes, check if the dhokla is cooked. Poke a toothpick or a fork and check if it comes out clean.

- If its cooked, then switch off the stove, and keep the dhokla aside for cooling.


- Cut the dhokla into small pieces.

Tempering

- Take a pan, heat oil, add mustard seeds.
- Once mustard seeds crackle, add sesame seeds and roast it. Add curry leaves and asafoetida.


- Bring the tempering out of the flame. Coat the Dhokla with this tempering.
- Sprinkle grated coconut, chopped coriander (if any) on top of the Dhokla.


Serving

- Serve the hot Dhoklas with mint chutney, methiya masala.


Variations

- Add vegetables like grated carrot, peas, finely sliced beans to the batter for vegetable Dhokla. Care should be taken while checking the consistency as carrot tends to leave water. If desired the vegetables can be sauteed before adding it to the batter.
- You can replace Fruit Salt by Cooking soda (Soda Bicarb). 1 spoon of Fruit salt can be replaced by 1/4 Cooking soda. (I haven't tried this version though).

Tips
- Consistency of the batter should be spoonable. It shouldn't fall freely when you drop it with a spoon. The batter should be little firmer than Rava Idli batter.
- Pre-heating of the steamer and keeping it ready is essential. This will help the Fruit salt to do its work and help raise the Dhokla well.
- Check the level of water before preparing the steamer.
- While the water level gets too low in the steamer, add hot water only. The Dhokla needs constant steam for it to cook well.
- Try not to open the steamer for the first 15 minutes at least. Opening the steamer will bring down the cooking temperature and it will affect the fluffiness of the dish.
- Colour of the Dhokla depends on the colour of the semolina/rava used. My semolina was cream in colour hence my Dhokla too.


Tuesday, 12 April 2016

Mangalore Bun


As the name describes, Mangalore buns aren't exactly buns. They are more like Bhatura in a Puri size. They are super soft, fluffy, stay fluffy and tastes best when hot. It can be served as a snack or as a main course.

Mangalore buns can be made in two versions, sweet and salt. The salt version is traditionally had with Sambar and Chutney.

I happened to watch a video of chef Vikas Khanna tasting this dish in Mangalore. On seeing the video, I imagined the dish to be something like Vada, but when I made it I realized what exactly it is.

My very good foodie friend Vatsala Kamath from Mangalore, shared the traditional recipe of this delicacy. Thank you Vatsala !!

Ingredients :

For 20 buns (Sweet version)


Sour Curds : 80 to 100 ml
Over ripe banana : 1 (big size)
Soda Bicarbonate : 1/2 Tspn
Salt : 1/4 to 1/2 Tspn (Depending on the salt)
Sugar : 1/4 cup
Maida (Plain flour) or Wheat flour : 1.5 cups 
(Traditional Recipe calls for Maida)

Procedure :

- Peel the banana, mash it using a fork.
- Add the sour curds, soda, salt and sugar to the mashed banana and mix them well using a fork (or hand).
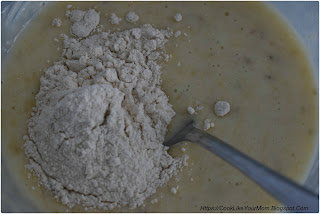
- Add maida / wheat flour to the banana mixture to make a dough. Add the flour little by little to stop at the right consistency.

While making the dough add the flour little by little to stop at the right consistency

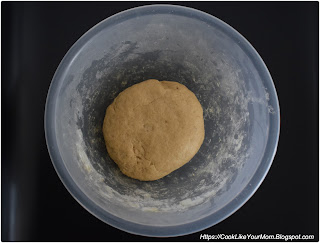
- Knead it into a thick dough (Like Chapati dough).
- Smear the dough with little bit of oil and keep it aside in a closed container for 6 to 8 hours.

Allow the dough to rest for 6 to 8 hours.

- Take one small portion of the dough. Flatten it using a pin roller into a small thick disc. The disc should be thicker than Puri or Chappati.
- Heat oil in a pan.

Flatten the dough into thick discs and deep fry them.


- Deep fry the flattened discs.
- Serve them hot

Hot yummy buns are ready !!


Tips :
- Traditional recipe calls for maida (Plain flour). But for a healthier version, wheat flour can be used. Alternatively you can also use half maida and half wheat flour.
- The banana has to be over ripe. But you can use fully ripe bananas too if you don't have a choice.
- Sour curds will give the best results, however normal thick curds can also be used.
- You may adjust the flour quantity while adding it to the banana mixture.  Sourness of the curd and ripeness of the banana play a major role in the amount of flour needed and also on the softness of the bun.
- Salt version can be made by reducing the sugar quantity.
- If you need a much sweeter version, you may add more sugar.
- The sweetness of the dough and the fried bun will exactly not be the same. Little bit of sweetness is lost while frying.
- The thickness of the flattened buns which are ready to fry should be more than a chapathi or a puri.
- Fried sweet buns will be dark in colour. They are not burnt. Its just the caramelization.
- When you peel the fried bun, you can see the nice perforated texture inside.
- Buns made our to maida tastes best when consumed hot. Buns made out of wheat flour stays longer when stored well in an air tight container. The fluffiness isn't lost either.

The texture inside the bun

Variations :
- You may also try out a variation by adding cardamom/cinnamon powder, grated coconut to the sweet Mangalore bun dough.

Try and let me know how you feel !!! Enjoy and see you in the next post.


Monday, 21 March 2016

Vazhakkai Podi (Raw Banana Rice Mix - Dry)

Vazhakkai Podi is a dish made out of Raw Banana (Kachcha Kela / Aratikaya / Balekai). It is a dry dish which is mixed with rice along with few drops of ghee (Clarified butter) or nallennai (Gingelly Oil).
This dish is very easy to make and needs very few ingredients.
This is one of my favourites. It helps add variety to a platter and can also be made as the main dish along with a gravy and papad.
This usually goes well with a kootu (Vegetable and Dal gravy)


Ingredients:

For two people

Vazhakkai / Kachcha kela / Aratikaya / Balekai / Raw Banana  : 1 (Medium Sized)
Urad Dal                                                                                      : 2 Tspoons
Dried Red Chilli (Long)                                                              : 1/2 or 1 (as desired)
Salt                                                                                               : As desired
Lemon juice                                                                                 : 1/4 Tspoon

For Seasoning
Oil                                                                                                : 1/2 Tspoon
Mustard Seeds                                                                             : 1/4 Tspoon
Curry leaves                                                                                 : One sprig
Asafoetida powder                                                                       : 1/8 Tspoon

Procedure

- Wash, cut and cook the raw banana.

Cook in a large pan with enough water. Allow it to boil.

- Allow the banana to cool. After it cools, peel and grate it (on the large eyed side of the grater).
When the banana starts to protrude from the peel it has got cooked.
- Dry roast the urad dal with the red chilli. Once roasted, remove from pan and allow it to cool.
- Coarsely grind the roasted dal and chilli.
- Add the coarsely ground powder to the grated banana and fork it gently.
- In a small pan, heat oil, add the mustard seeds and allow it to crackle. Once it crackles, add the curry leaves and asafoetida powder. Remove the pan from flame.

Dry Roasting for the powder, Seasoning, And Mixing.


- Add the mustard seasoning to the grated banana mix along with salt and lemon juice.
- Tenderly mix all the ingredients together.
- Vazhakkai Podi is ready to be mixed with hot rice.

Vazhakkai Podi ready to be served.


Tips
- Banana's Texture :  The banana shouldn't be over cooked as it becomes mushy and difficult to grate.
- When to stop cooking : The minute the flesh starts protruding out of the peel, we can stop cooking the banana. (Pls check the picture above).Alternatively, a fork can be pierced to check the tenderness.
- How to grate : After the banana is cooled down, grate it from the large eyed side of the grater.
- How to mix : Mix the ingredients gently. Once the seasoning is added, mixing is easy as the oil helps in keeping the texture intact.

Sunday, 13 March 2016

Karadaiyan Nombu Adai / Nombu Adai / Steamed Rice Doughnuts (Savoury/Jaggery)

Tomorrow is "Karadaiyan Nombu" in Tamil Nadu. Its believed that Savitri brought back her husband Satyavan from Yama on this day (First day of Panguni Month).
For more info click here : https://en.wikipedia.org/wiki/Savitri_and_Satyavan

Women pray for the long life of their husbands and unmarried girls pray for a good husband(future).

I am sharing the recipe for the two customary dishes which are prepared and offered to God on this day. Women and girls after their prayer eat this first. Other family members get to eat it only after the womenfolk are done.

As I child I remember my brothers waiting for me to complete my food so that they can get to have their portion of this yummy food. I used to eat as slow as possible just to irritate them. Later on, they waited only till I had the first bite. :)

This is made as a tiffin item too on a normal day. My nephew loves this so much that my sister-in-law makes it very often as a tiffin.

There is a sweet as well as a salt version. As this dish is steamed, its very healthy.

UPPU ADAI (Savoury Doughnut)

Traditional Method

Ingredients:

Ratio 
Raw rice flour : Water
1                      : 1.25

For making 6 pieces

Raw rice : 1/4 cup
Cooked black eyed bean (Karamani) : 1 table spoon 
Water : 1/4 cup + little extra
Coconut pieces : 1 spoon
Salt (as per taste)

For seasoning
Mustard seeds (Kadugu)
Urad dal (Ulundu)
Green chilli pieces
Curry leaves
Asafoetida : 1 pinch

Procedure

- Wash and dry the rice. Once dried, roast it on a pan (Colour shouldn't change).
- Fine grind the rice in a mixer.
- Take a pan, heat little oil, add the seasoning. (Mustard seeds first. Once it spatters, add the other ingredients)
- Add the boiled black eyed bean, coconut pieces, water and salt to the pan.
- Once the water starts boiling, add the powdered rice. (Keep stirring with one hand as you add the rice powder)
- Remove from flame and allow the mix to cool.
- Knead the mix. If its crumbly, sprinkle some hot water and knead.
- Make small patties with a hole in the centre.
- Grease plates/idly mounds, place the patties and steam them.
- Serve hot with butter.


White ones are the Uppu Adai


VELLA ADAI (Jaggery Doughnut)

Ingredients

Ratio : 
Rice flour : Jaggery : Water
1               : 3/4         : To melt the jaggery

For making 4 pieces

Raw rice : 1/4 cup 
Cooked black eyed bean (Karamani) : 1 table spoon 
Jaggery : Little less than 1/4 cup
Coconut pieces : 1 spoon
Cardamom powder : 1/4 tspn

Procedure

- Wash and dry the rice. Once dried, roast it on a pan (Colour shouldn't change).
- Fine grind the rice in a mixer.
- Take a pan, melt the jaggery with little bit of water.
- Add the boiled black eyed bean, coconut pieces and cardamom to the pan.
- Once the mix starts boiling, add the powdered rice. (Keep stirring with one hand as you add the rice powder)
- Remove from flame and allow the mix to cool.
- Knead the mix. If its crumbly, sprinkle little hot water and knead.
- Make small patties with a hole in the centre.
- Grease plates, place the patties and steam them.
- Serve hot with butter.

Brown ones are the Vella Adai


Alternate method

Readymade rice flour can be used instead of washing, drying, roasting and fine grinding raw rice.

Tips
- One cup of raw rice on fine grinding gives one cup of rice flour.
- Keep aside little hot water. While adding the flour to the hot water, if you feel water is less, you can add little to it.
- While adding the rice flour to the boiling water, keep stirring and add it slowly. This helps avoid the formation of lumps.
- While kneading the dough, sprinkle little hot water if it is crumbly.
- Grease your palm while making the patties. 
- Best way to make the patties is by patting them on Banana leaf or Aluminium foil.

Sunday, 6 March 2016

Arisi Adai (Rice Pancake)


South Indian food has many more to it than Dosa and Idly. Arisi Adai is a Palakkad TamBrahm recipe, which we relished all through our growing years. It is a thick pancake, which needs to be eaten by peeling it. It tastes best when it is hot.

After we grew up, we started making the thinner version(ladle version). It helps one feel lighter after eating.

Arisi adai is a pan dish, made out of soaked idly rice (par boiled rice). It goes well with something tangy and spicy. A dollop of fresh butter on top of the dish while serving, adds a signature flavour.

This is one of my favourites.

Ingredients :

For two persons.

Idly rice : 1 cup 
Coconut : 1/4 cup (grated/chunks)
Salt : per taste

Procedure :

Traditional method 

> Wash the rice and soak it till tender.(6 hours)
> Grind the rice in a mixer/grinder along with the coconut.
> Grind it into a smooth thick batter. (Neither runny nor too thick).
> Allow it to ferment by keeping it aside for 5 to 6 hours. (for a hint of sourness).
> Add salt per taste to the batter.
> Heat a tava and smear oil on it.
> Now take a fist full of batter (as its not runny, you will be able to hold it). Spread it on the hot tava by patting it (Wet your hands as you pat).
> Make a hole in the centre of it.
> Oil from the sides, in the hole, cover with a lid and allow it to cook (Covering will keep it soft)
> Cook on both sides by flipping.
> Serve it with a tangy side dish and a dollop of butter.


Easy way

> Wash the rice and soak it till tender. (6 hours)
> Grind the rice in a mixer/grinder along with the coconut.
> Grind it into a smooth batter. (Runny)
> Allow it to ferment by keeping it aside for 5 to 6 hours. (for a hint of sourness)
> Add salt per taste to the batter.
> Heat a tava and smear oil on it.
> Now take some batter in a ladle and spread it on the tava.
> Oil from the sides, cover with a lid and allow it to cook. (As this is a thinner version, covering is mandatory to keep it soft)
> Cook on both sides by flipping.
> Once done, serve it with a tangy side dish and a dollop of butter.

Tips :
> Don't have enough time to ferment ? Add lemon juice or sour curds.
> Don't have enough soak time ? Add hot water while soaking.
> Want Neer Dosa ? Replace the Idly rice with Raw rice and grind it (Watery). Instead of spreading it with a ladle, pour the batter on the tava and shake it to spread the batter.

Taste Enhancer : In Kerala, Murungai ilai (Leaves from the drumstick tree) is added to the batter, to enhance the taste. You may add any leafy vegetable (methi leaves / fenugreek leaves, spinach).


Try this dish, enjoy and do let me know as how you felt !

Cook Like Your Mom
Rice and Coconut ready to be ground.
Cook Like Your Mom
Ground Batter
   

Cook Like Your Mom
Arisi Adai

Arisi Adai
Cook Like Your Mom
Arisi Adai & Vathakuzhambu